 In my previous post, we discussed effective strategies for managing arthritis in the fingers. Today, I want to shift the focus to the thumb—a joint commonly affected by arthritis that plays a vital role in everyday tasks. Thumb arthritis can lead to pain and stiffness, but incorporating targeted yoga for thumb arthritis pain into your routine can provide significant relief. With mindful movement and gentle stretches, yoga helps alleviate discomfort, improve flexibility, and support overall joint health, making it a powerful tool in managing thumb arthritis.
Understanding Thumb Arthritis
Arthritis in the thumb commonly occurs at the base, known as the CMC (carpometacarpal) joint. This degenerative condition often arises from repetitive motions—think knitting, typing, or thumbing a text message, where the same movements occur frequently. However, it’s essential to note that while some parts of the thumb may be overused, there are also areas that are underutilized. The key to alleviating arthritis lies in employing the full range of motion of the thumb and engaging it gently but effectively.
Emphasizing Joint Health
At the core of the Avita practice is the understanding that we must address the joints, not just the surrounding muscles. We use muscle engagement to access the joints and facilitate healing. Follow this simple yet effective shape to help with thumb arthritis, or click here for the video, and I’ll talk you through it.
Thumb Movement Exercise
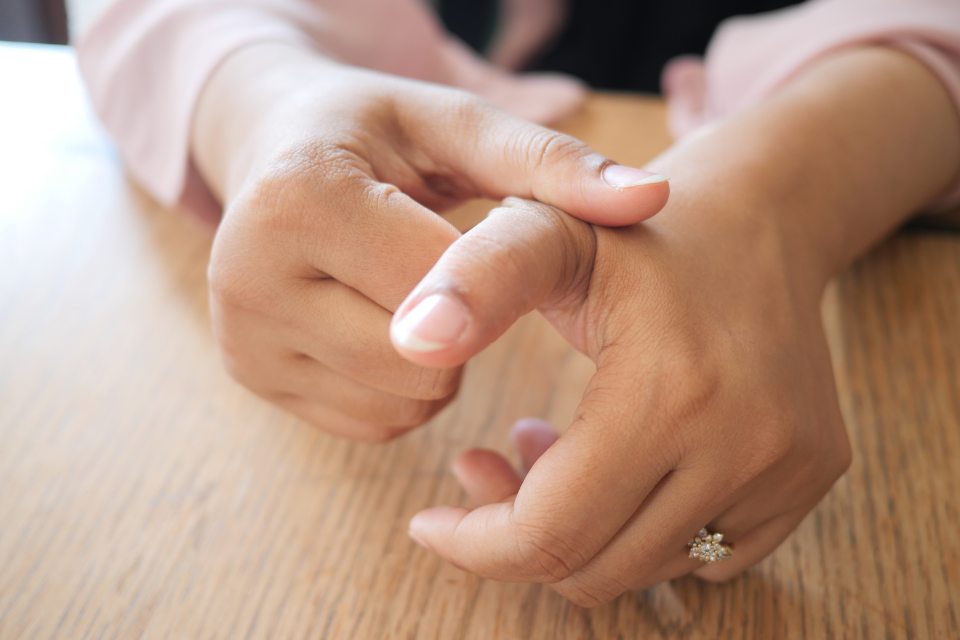
- Start Position: Move your thumb towards the base of your pinky finger, mimicking the shape of the number 4.
- Sustain the Position: Once you’ve found your range—wherever it may be. Work with the sensation! Make it just right so it’s not too painful. Hold for 1.5 to 2 minutes, optimal for stimulating the joint’s healing physiology.
- Focus on Sensation: As you hold this position, be aware of any sensations or discomfort in your thumb. Welcome all feedback. You may feel tension or mild discomfort, especially at the arthritis site—this is part of the healing process.
- Extend Your Fingers: While you bend your thumb towards the palm, ensure your other fingers are extending away from the thumb. This dynamic helps create balanced movement across the hand.
- Closing Your Eyes: Feel free to close your eyes and meditate on this sensation, deepening your awareness of the healing occurring within.
Passive and Active Techniques
After sustaining this position actively, move into a passive shape for the thumb:
- Passive Extension: Use your opposite hand to gently guide your affected thumb into the same shape toward the base of your little finger. Allow your fingers to relax and focus on the pressure in the base of the thumb.
- Adjust Your Grip: Sometimes changing your wrist position can lead to different sensations. Experiment with slight curls or extensions to find what feels best for you.
- Listen to Your Body: Use any pain as a messenger to guide you closer to the source of the discomfort. Remember, we are not forcing any movement—we are encouraging a natural reorganization of the joint.
- Hold and Breathe: Maintain this passive position for another 1.5 to 2 minutes, focusing on the continuity of breath and the sensation of both relaxation and slight pressure.
Regular Practice for Long-term Benefits
It’s crucial to integrate this practice into your daily routine. I do! Aim to perform these exercises daily, especially if you are experiencing thumb arthritis. This routine can stimulate healing physiology, which will work for you throughout your day.
Tailor Your Practice
Remember, your practice does not need to look identical to mine. Everyone’s experience with arthritis is unique; conversely, your healing journey is yours to navigate. Be kind to yourself and listen to what your body is telling you.
Conclusion
Effectively alleviating thumb arthritis pain requires a mindful approach to movement, with a focus on supporting the joints and fostering the natural healing process. Avita Yoga offers a gentle, therapeutic approach designed to address joint discomfort and improve mobility. With patience, consistency, and early intervention, meaningful results are possible, even in the face of joint degeneration. The sooner you begin, the greater the potential for long-term relief.
Thank you for joining me today. If you have any questions or would like personalized guidance on incorporating Avita Yoga into your arthritis management, please don’t hesitate to reach out. Your journey toward better joint health is important, and I’m here to help every step of the way.
Namaste,
Jeff 🧡


