 Back pain is a common concern affecting individuals of all ages, often caused by factors such as arthritis, extended periods of sitting, poor posture, or stress. Fortunately, Avita yoga for back pain provides a gentle yet effective solution to alleviate discomfort and restore balance to your body.
In this blog post, I’m going to introduce another shape—an inverted shape at the wall —that highlights a valuable way to incorporate the wall into your practice. This gentle shape promotes hip mobility and encourages movement in your lower back, leading to greater comfort, improved circulation, and a sense of freedom throughout your body. With consistent practice, this movement can help alleviate back stiffness, fostering a feeling of ease and balance.
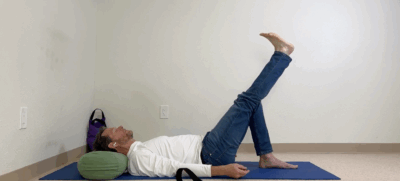
Legs Up the Wall
How to Practice:
- Sit on the edge of your yoga mat, with one hip very close, if not touching the wall.
- Roll back onto the mat and swing your legs up the wall. Position yourself so that the back of your pelvis rests on the floor with your knees extending effortlessly. Most people are 10 to 20 inches away from the wall.
- Close your eyes and let your spine adapt to the floor.
- As an alternative, place a folder blank (2″ to 3″ thick under the pelvis, which further invites the lower back to ease toward the floor in passive flexion.
In the Avita Practice, every detail matters. It becomes clear how closely knee mobility connects to the health of the hips and lower back. While allowing the lower back to flex toward the floor, this shape also introduces passive knee extension, helping to address any rigidity or stickiness in the area.
Note: If you’re too close to the wall, the shape may load the hamstrings unnecessarily. Adjust your position as needed to ensure comfort and effectiveness.
Half Padmasana – Figure Four Shape
How to Practice:
- Cross your right ankle over your left thigh near the knee (on the thigh muscle just below the kneecap, not on the kneecap itself).
- Keep your left knee straight and focus on the sensation in your right hip, which is the primary target.
- Slowly bend the left knee, increasing your right hip’s sensation. Listen carefully to the feedback. This is NOT about a deep stretch but a gentle neuromuscular release.
- Lower your left foot down the wall until you feel a balance between the wall and the floor.
- Open your hands to the sides, palms facing up, and let the shape settle in. Stay one to two minutes.
- To release the shape, slide your left foot up and place your right foot onto the wall.
- Pause and notice the difference between your hips.
- Cross your left ankle over your right thigh and repeat the steps, listening to the sensations in your body and letting them resolve naturally.
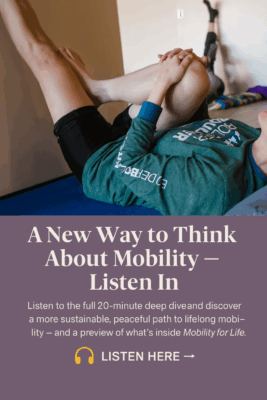
Knee to Chest
How to Practice:
- With your legs up the wall and your head supported, bring your right knee toward your right shoulder, interlocking your fingers behind your thigh. Gently guide the knee closer to the shoulder, maintain for 1 to 2 minutes, then release.
- Repeat on the left side.
Pause and reflect on the sensations, allowing the practice to bring peace and balance to your body.
Finishing the Practice
To conclude:
- Bend your knees and push yourself back slightly.
- Stretch your arms and legs out, then roll onto one side.
- Use your arms to push yourself into a seated position.
To see these shapes in action and gain helpful tips, watch the video for detailed visual guidance.
The Power of Yoga for back pain:
Yoga is a powerful tool for relieving lower back pain when practiced consistently and mindfully. Starting with these gentle shapes, you’ll gradually experience improved mobility, reduced discomfort, and a greater sense of well-being. Embrace the process—your journey to a healthier back begins today!
Namaste.
