In the previous blog post, we discussed the importance of dorsiflexion—the ability to lift the foot off the ground. This movement is important because, during walking, there is a moment when the foot is in dorsiflexion, and you need to have that degree of movement to have a comfortable, healthy walk. Well, another piece to the puzzle is plantarflexion—the ability to lift the heel. Walk slowly and deliberately, and you can feel the calf muscles engage and lift the heel.
The Walking Cycle
When you walk, there’s dorsiflexion in the back foot. You push off your toes, follow through, and then the heel strikes. Between that follow-through and heel strike, you need dorsiflexion, and when you take the next step, the pattern repeats itself.
Now, here’s the important thing: if either of those movements is impeded, there will be an impact up through the rest of the body. The knee will be compromised, and the hip, and sometimes even the lower back and spine—can be affected without a fluid walk or fluid ankle movement.
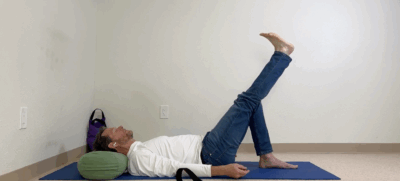
So today, I’ll guide you through some shapes and movements to improve dorsiflexion and plantarflexion, helping you maintain a healthy walk. Let’s get started
You’ll need support for your head and some kind of strap—a six-foot belt will do.
- Lie back.
- Put your legs up on the wall.
We love the wall for the many shapes and movements we do in Avita Yoga. It allows the lower back and spine to open onto the floor, but we will focus on plantarflexion. In the previous blog post, we put the strap over the ball of the foot, hands up high, working on extending the knee and dorsiflexing the ankle — which releases the back of the leg. The calf muscle releases; the Achilles tendon has to release. There’s lots of fascia around the ankle, all adaptable, and it needs to change to facilitate that movement.
Today’s Focus: Plantarflexion
Step 1:
- Place the strap around the heel of your left foot.
- Curl the toes and begin to move the foot toward the wall.
- Keep the heel on the wall and knee straight.
- Relax the right leg.
- Hold the strap high.
If you must, you may wrap the strap around your hands. With time and practice, you can have your hands working with little effort. Close your eyes, relax your upper body and shoulders, and open the left foot’s instep, curling the toes.
Expect cramps:
Because shoes limit this movement, cramps almost always occur when you start to curl the toes and move the foot toward the wall. The calf muscles cramp, and sometimes, the tendon itself begins to cramp. The intrinsic muscles in the bottom of the foot—which hardly ever get used—also cramp. Don’t be afraid of them; you want the movement and cramping will resolve with time and practice.
Do the cramp dance:
- Slowly curl the toes and move the foot toward the wall.
- When the cramp starts to come on, pause. You back off a little but try not to give up.
- Try to let the cramp resolve.
- Keep coming back to the practice. With time and consistency, you’ll work through them.
If your toes cramp, try to stay in the shape and allow the cramp to release.
After a couple of minutes, move the strap to the heel of the right foot.
- First, aim to curl the toes as fully as possible — flexing the muscles in the bottom of the foot.
- Move the sole towards the wall.
- Keep the knees nice and straight.
- Keep the heels on the wall.
- Do the cramp dance.
- Open the instep.
- After a couple of minutes, set the strap aside and rest.
Strap Work for Joint Compression and Ankle Mobility
- Put the strap on the left heel once again.
- This time, push the strap up into the heel and draw on the strap a little bit — tugging on the strap in line with your left leg.
- Straight knee.
- Gently pull down the strap in that same line.
The impact goes through the straight knee down into the hip.
- Engage the quadriceps.
- Engage the muscles on the front of the shin.
- Open the sole of the foot toward the ceiling. We’re going for the full expression of the ankle in dorsiflexion now.
- After 1.5 to 2 minutes, release and put the strap on the heel of the right foot.
- Let the left leg relax and straighten the right knee.
- Pull the toes toward you.
- Push up into the strap.
- Heel toward the ceiling.
- Shoulders away from the ears — but with a firm grip,
- Draw on the strap and put pressure down through the bones of a straight leg into the hip.
You’re working on dorsiflexion, but you’re also working on full extension of your knee. By tugging the strap, you’re putting healing compression down through the length of the bones—and bones and joints love pressure. It cleanses the joints and makes the bones stronger and denser.
When the time is right:
- Release the strap.
- Set it aside.
- Close your eyes.
- Rest your hands at your sides.
- Try not to shake out your hands too quickly. Have a moment of rest.
Every shape, every moment, has a purpose throughout the whole body. Here, we’ve given the hands and fingers a lot of healing work.
- Slowly open the hands and spread the fingers.
- Get the full extension of the fingers — and then rest.
- Savor the moment, savor the shape.
When you’re ready to come up:
- Bend the knees.
- Roll onto one side.
- Push yourself up.
Integration into Walking
Here’s how you can begin integrating this practice into your walk to maximize its potential.
- Go to the wall.
- Put your right foot at the front corner of your mat and your left foot back toward the edge. Your feet should be wider than normal, and the heels should be slightly out.
- The outer edges of the feet are even with the edges of the mat.
- The knees are straight.
- Hands are on the wall at shoulder height.
- Squeeze your legs.
- Extend the knees and press back into the left heel.
Can you feel the dorsiflexion? Straight, strong legs. Straight knees.
Shorten the step back if you can’t straighten both legs.
- Now, slowly lift the left heel off the floor — plantarflexion.
- Both knees remain straight.
- The weight is equally balanced between your two legs.
- Lift the left heel fully and press down into the toes.
This is the extension of the toes—an important movement for a nice, fluid walk. If possible, sustain this shape for a couple of minutes. You’ll really get into the calf muscle. If it cramps, lower a little bit, but try to stay with it. Work through the cramps.
After 1.5 to 2 minutes,
- Lower the heel.
- Put the left foot forward and the right foot back.
- Hands on the wall, shoulder height. Heels slightly out, evenly weighted through the legs.
- Firm the thighs.
- Press down into the back heel.
Feel the release through the calf muscle, the Achilles tendon — even into the back of the knee.
- Hold for a minute, and then lift the back heel.
Your range may differ from side to side.
Feel the extension of the toes, especially the big toe. Try to keep the heel centered, straight up toward the ceiling.
- Both knees are strong and straight.
- Eyes open. Gaze straight ahead.
- Hands supporting.
This isn’t a balancing act — you are cleansing the toes, cleansing the knee, activating the calf muscle, and practicing a sustained plantarflexion movement. You aim to maintain and appropriately increase mobility for this practical movement.
After 1.5 to 2 minutes:
- Lower the heel.
- Bend the knees.
- Release from the shape and go for a little walk.
- Feel the impact of your practice.
Improve your walk to improve your balance and limit your chances of falling.
For visual guidance on these movements and more, watch this video to enhance your practice.